Showing posts with label home decor. Show all posts

Make a Clipboard!

In my last post I shared a clipboard I made and promised a tutorial was coming. Well, I'm not sure how much of a tutorial it is since I forgot to take pictures along the way, but here it is!


I am loving the trend of using clipboards to display just about anything that will lay flat but most of the time I want to display something that would be lost on a normal size clipboard. Plus, a run of the mill clipboard can't stand on it's own.

I had ordered some prints from Katy Girl Designs {click here to visit her Etsy shop} and had planned on displaying this one on my chicken wire frame above my work table. Once it came I realized it was too cute to be clothes pinned up to chicken wire.

I used a piece of 2x8 wood I had cut 10 inches long and stained it. The beauty of this is that you can cut one to any size, plus you can use a thinner board if you want to hang it on the wall. And you can paint it to match your décor. I chose to stain this one since I am a huge lover of the beauty of wood grain, especially when it's a little knotty. ;)


I did give it a good sanding the next day once the stain had dried, just to give it a rustic, well loved look. For protection and to give the wood a little sheen I added a coat of furniture wax. It helps deepen the color and keep the wood from looking like it's dried out.

This whole project started because I had found these clipboard clips at Hobby Lobby.


They come in a two pack and have a wonderful vintage feel. Although, I seriously think that Tim Holtz only knows vintage. The only downfall with these clips is that they do not come with screws for mounting. I dug through our boxes of mismatched screws and found the ones that would work best.


Old and a little rusty. I would be lying if I even tried to tell you what they came off of.

Now comes the fun part, displaying whatever your heart desires and having a fun photo shoot!


And as always, nothing gets photographed in the backyard without these two butting in while trying to look like they're not!


A Vintage Inspired Halloween

Browsing around blog land I have come to realize that I may be the only one that has not decorated for Fall yet. Why not? For 2 simple reasons:

1. I find it hard to get in the Fall spirit when it is still the temperature is still hovering between 90 and 100.
 
2. My family really loves for me to decorate for Halloween.

One year I didn't put anything up for Halloween and that was pretty scary. My now 8 year old has always loved to watch the transformation and she threw a full on fit that year that it was Halloween and we didn't have one single Halloween decoration out. Now she's sure to remind me that it is coming up and will even ask her father to get the Halloween bucket out of the attic as a visual reminder that I need to put the decorations up.

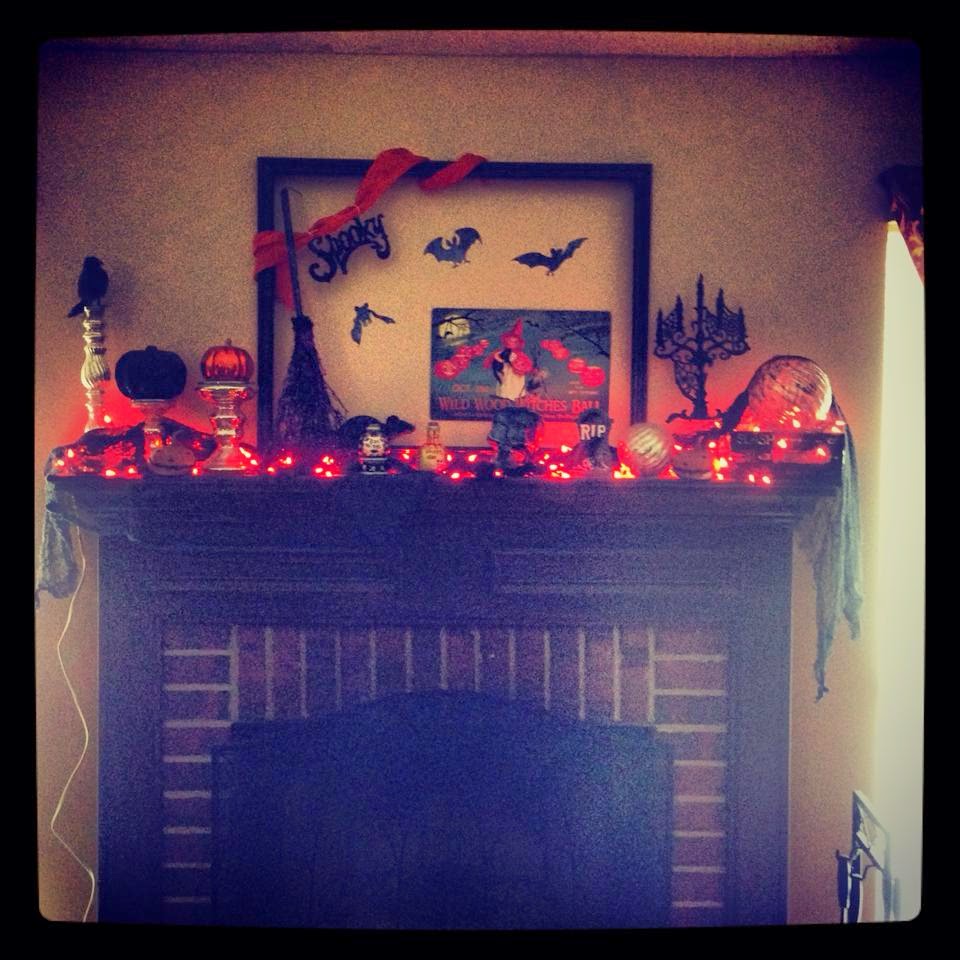
This is our mantel from last year, it's been the typical Halloween mantel for us...


Some dollar store items mixed in with some pumpkins and lights. Sometimes it's more, sometimes it's less... and sometimes is nothing :) .
 
This year I'm wanting to change it up a bit. If you know me, you know that I am a vintage lover to my core. I'll take dusty and rusty over brand new and sparkly any day. I was absolutely tickled to see that Hobby Lobby had some vintage reproductions in their Halloween section. I need to set a week aside to go in daily to use my 40% off coupon. Scratch that, I just realized they have marked Halloween 40% off!
 
I decided to browse Pinterest to get some ideas...


I pinned all of these that were linked back to various blogs and websites but soon found out that they all came from the very talented Johanna Parker Design. I love how authentic they look, I'm sure they look even more like actual vintage pieces in person.
 
I also found some really fun collections that are displayed beautifully. This wall collection would be so fun above the mantel or as a display wall for your trick or treaters to drool over when you open the door.


And I love this collection of crepe paper characters. I'm learning that crepe paper was essential when it came to decorating.


And I love how this one mixes some Halloween in with their dishes and everyday things. {And the link leads to a slideshow with some other great ideas!}


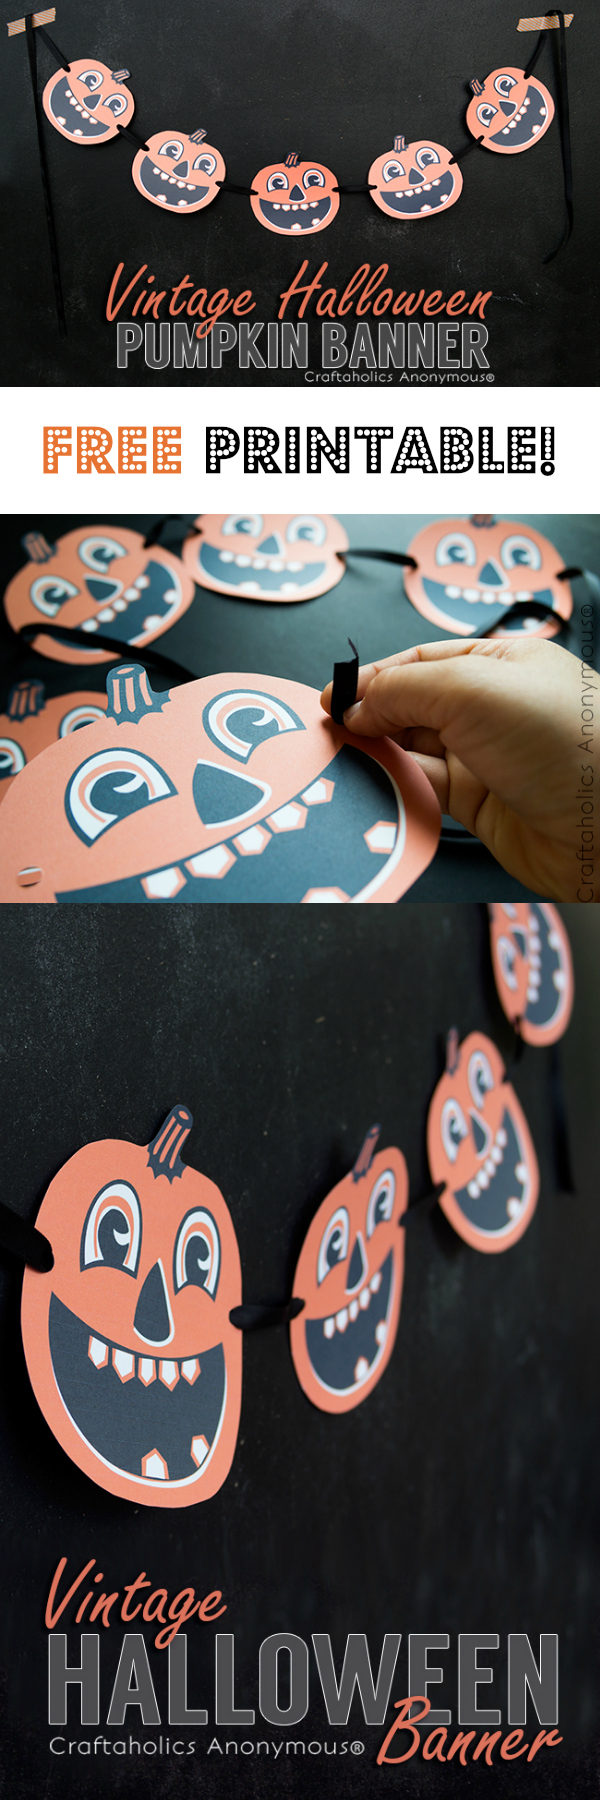
Have I got your vintage loving creative juices flowing? Well, then here are a couple vintage themed printables that I found and will be definitely using somehow with my decorations.


Click here for the fun cupcake toppers and here for the vintage Halloween banner.
 
I'm looking forward to using some of these ideas I've shared with you to bring a little Halloween in to our home. I have already asked my husband to save all the tree branches he plans on trimming off our tree this weekend for my Halloween decorating. Stay tuned and I will be posting pictures soon! 


All That Glitters...


Sooooo, I felt like I was getting on a roll with getting new blog posts up, but since (and during) the last time I put a new blog post up I was in the middle of getting my girls ready for school, my girls started school (=new schedule to get used to), I fell a little behind on orders and needed to catch up, I decided I wanted to devote more time to my retail space that I have not given it  and I got sick...BUT, the good news is I'm slowly working out a schedule that will let me post more often.

Anywho, let's get down to what you came for...glitter!!


I recently ordered some new German glass glitter from Meyer Imports and while paint was drying on orders, I have been having some fun with it. I have used it before on chipboard letters and turned them in to magnets. While digging through my craft hoard  stash I found an obscene amount of wood clothes pins and the glue and glitter started flying.


Working with the glass glitter is a really easy, fun and cheap way to add a little sparkle to ordinary things. Meyer Imports also sells a glue that works great, but I've also had really good luck with the Elmer's Glue All glue. Make sure it's not the school glue though, it's not strong enough to hold the heavy glitter on your item.
 
 
I'm a big fan of the glitter in a simple jar for decoration also. My girls and I made a quick trip to Hobby Lobby one day and I found some really cute small jars and tags that I thought would work for small wish jars. When the 11 year old excitedly agrees and asks for one for her room, you snap the supplies up.


I just used some small stamps I had on hand with some Tim Holtz metal tags and tied it on with some red and white baker's twine. How fun would these be as Christmas ornaments? I'm also debating about putting them in my Etsy shop, some sparkle to balance out all the wood.
 
In my downtime watching paint dry I also start looking at things I have lying around to reuse for something fun. I had a thick cardboard tube that had potential. I took it out to my saw, cut off a chunk of it and craftiness ensued.


I cut random pieces out to make it in to a quirky little crown.


That this quirky girl decided to try on...


Fixer Upper and Chapel Rd.

If you follow any blogs about home décor, chances are you have heard at least one of them talking about HGTV's new show, Fixer Upper. I decided to see what the fuss is about and I am hooked. I spent a whole day, while working, watching any episodes that were On Demand with Time Warner. The best part? The show is filmed in Waco, Texas which is an hour north of where I live. (My friend Kristi from I Should Be Mopping The Floor and I may or may not be planning on how to stalk meet Chip and JoJo.)

Why is this the best part? Because so many shows that I fall in love with for inspiration, for my own house, always seem to be on the other side of the country. I have come to believe that the New England/East Coast area and the Oregon/Washington area have the most fabulous areas to junk in and that it is hopeless to decorate my home the way I want, within the budget I have. To see a show that is filmed an hour away with the style I would love to have in my own home, that gets the creative wheels spinning.

And did they start spinning.

A while back I bought an old street sign that caught my attention.


It wasn't as old as I would have liked it, so I took a sander to it, roughed it up and then lost all inspiration and it sat in a closet.

After my Fixer Upper marathon I decided to pull it out and dig through my scrap pile. After I found the perfect piece I decided to give this stain color a second chance.


I want to love this shade, I really do, but it has too much red in it for my liking. I let it dry a bit and then started sanding it down some.


One of my favorite things to do with stain is to layer it to either get a custom color or make it look like an older piece that has been handed down. Before the first coat dried completely, I added a coat of a new shade called Weathered Oak, hoping that it would make it look like I had found the wood out in a field.


Nope. I think every bit I put on rubbed right off after letting it sit for 5 minutes. I knew I had to break out Old Faithful...


Dark Walnut. I don't know how many shades I have tried and I always go back to Dark Walnut.


Now I have the shade I want and layering it over the Gunstock gives it some of the depth I was looking for. I even used the stain left over on the rag on the street sign to give it an older feel.


My original plan was to screw the sign directly to the wood, but when I laid it down on the wood I decided I didn't want to lose the rippled shape it had developed over time. I dug through my husband's collection of hardware (I hoard wood, he hoards screws and building hardware...it's a match made in heaven) and found these black plastic pieces that were the perfect height for how high I wanted the sign to sit off of the wood.


Now if the sign was made out of wood I would have used regular screws. Since the sign is metal I had two options, drill a hole for the screw or use these...


Self drilling, or self tapping, metal screws. The funny tip on the end basically drills a hole as you are screwing it in. They are made especially for when you are working with metal and are a lifesaver, especially if you don't have a set of metal drill bits on hand (or you can't remember which set of your husband's is for metal.)

I first drilled the screws in to each end of the sign and then placed the black riser under each screw and attached it to the wood backing.


It's hanging right by our French doors that will at sometime lead out to a covered patio and deck. My plan is to make a collection of signs, as well as some unusual antique finds, to hang on the wall. I'm also working on a fun coffee bar/patio drink server idea to put underneath!

How to Install a New Light

I think in my past life I was an electrician. Seriously. I don't remember learning from my dad how to work with wiring things, it just feels like I've always done it and enjoyed doing it. It no longer surprises my husband to come home and find a new light or ceiling fan up when I find one for a great deal!

So today I am sharing...


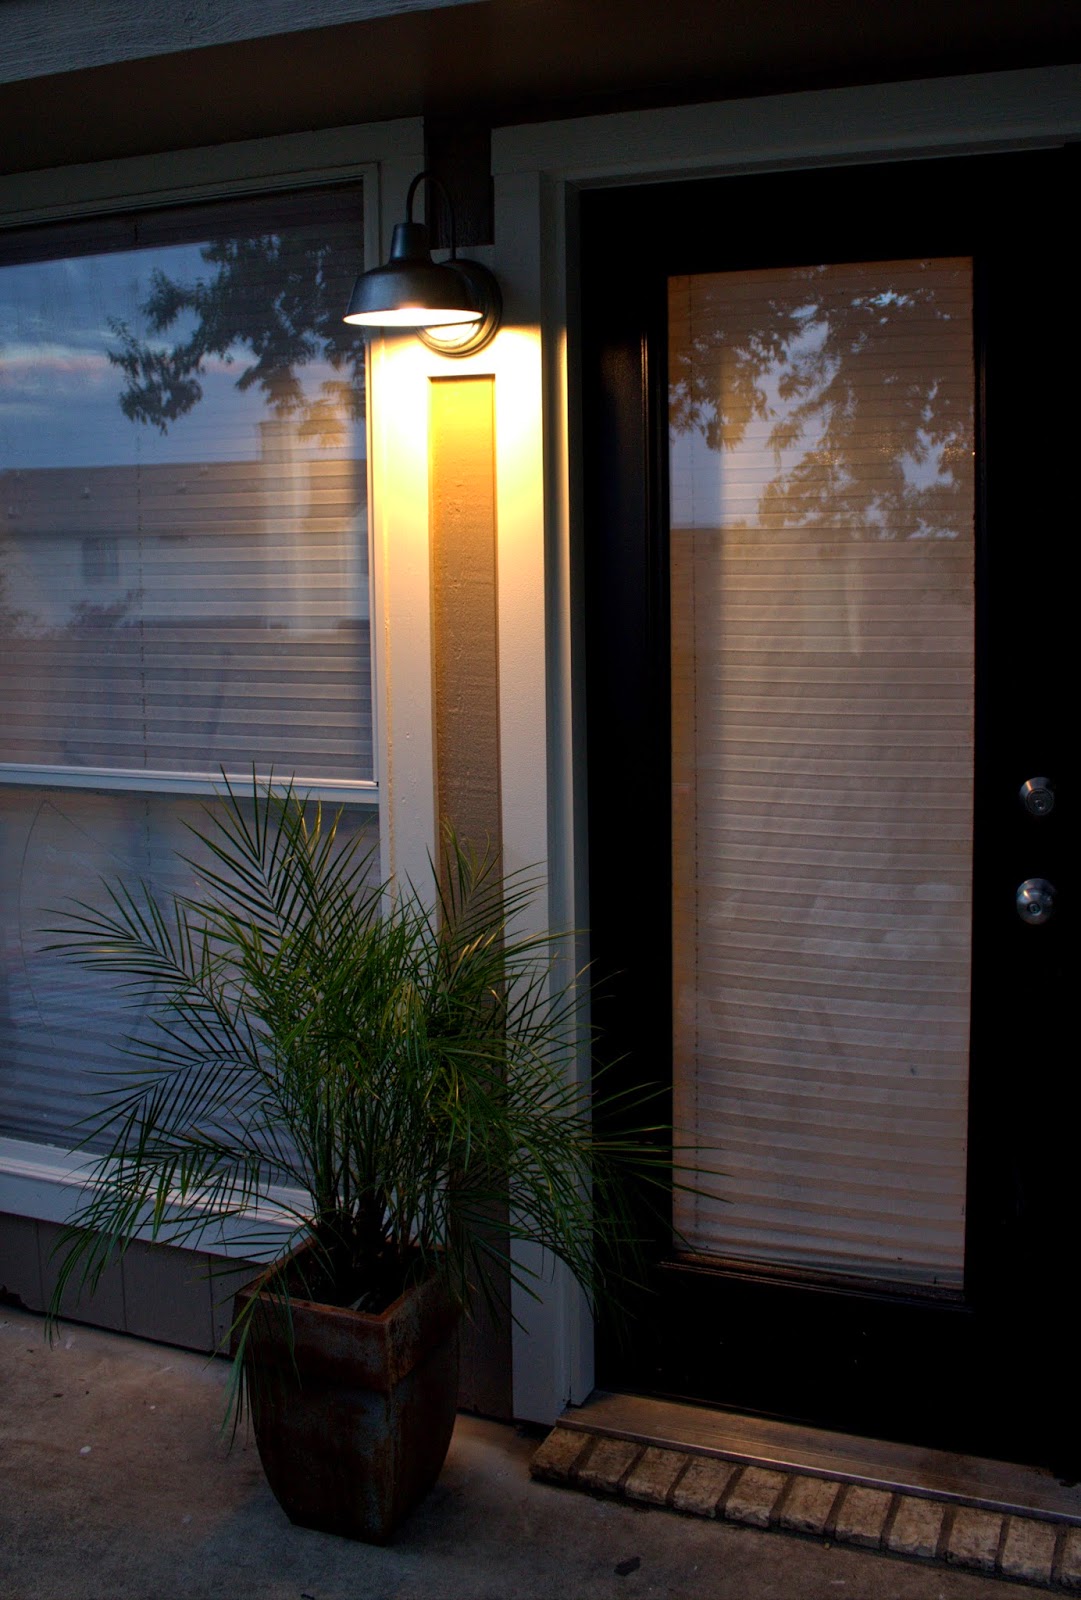
We have been in the process of painting and updating the outside of our home and in this tutorial I am replacing the light on our back porch. The good thing is that whether you are replacing a light outside or inside, on the wall or the ceiling, it's the same steps.
 
These are the tools that you will need for replacing a light.


The new light, the hardware that came with the light and a drill {or screwdriver}. Photo bombing chocolate lab not required.


My project also required our brad nailer and the air compressor. My parents built the house in 1993 and at that time, the home builder didn't take in to consideration that, at some point, future homeowners might want to upgrade certain parts of the house, like the lighting.


The space that the old light was in was too small for the new light I bought. Luckily it's an easy fix. But first, make sure the breaker that controls the light you are working on is turned off. I usually have one of my daughters watch the light while the other stands halfway between us to tell me when the other yells that the light is off. Now you can remove the old light and the bracket that is attached to the wall.


My husband had already removed our old light when we were painting the house and he just capped the wires off until we could get a new light up.
 
The bracket should be attached to a box (usually blue) that the wires are coming out of. Challenge #2 with our house, I'm pretty sure the back porch light was an after thought. No box, just a hole in the wall with wires coming out. Thank goodness Challenge #1 will take care of #2!


My ever growing scrap pile was the answer to my problems. I cut two pieces of the trim we used for the French doors to fit in the space between the window trim and the door trim and nailed them in using the brad nailer. I made sure to check which way the wire was coming through the hole before nailing.


Now is the point where you would line up the holes in your bracket to the holes of the electrical box and screw them in. Since there is no box on this light, I took the wood screws that were used on the bracket from the old light and used them to screw the new bracket to the wood I just nailed up to fill the gap between the wall and the light base.


As I was climbing down the step ladder at this point I realized I had a captive audience that couldn't wait to get back outside. (Please pardon the nose prints! My new project is finding a way to keep them from scratching up the freshly painted doors.)


Next up for the light is hooking up the wires! I promise it is easy. When connecting the wires always remember: White always goes to white, black always goes to black and the bare copper wire coming from the light is always the ground wire that will attach to the green wire coming from the wall and/or the green screw on the bracket. Twist the matching wires together clockwise (you may need to trim the wire if too long or remove some of the plastic coating on the wires) and then take the wire nut (plastic cap item) and insert the wires into it and twist clockwise until tight.


Now push the wires back in to the electrical box and put the mounting screw(s) through the holes on the light and use the provided cap to tighten. Before you tighten it down completely take a second and make sure that it looks level and straight. If it does, tighten that baby down and give yourself a pat on the back!!

Go back and flip the breaker back on and go test out your new light. Stand back and say a few choice words in frustration when your light doesn't work...because you turned on the wrong light switch!

Wasn't that easy?! Now there is nothing stopping you from getting rid of those tired, outdated lights you avoid looking at.


In case you were wondering, this is the brand and stock number of the light I used from Lowe's. There are two sizes, I went with the smaller version that was $29.88 (?). It will go with the new cedar patio cover we are putting up that will have a galvanized roof (squeal!!). I will definitely be taking photos of that project to share with you!


If I missed a step or if you have a question, leave me  comment and I will get right back to you!