Little girls are the best. They're adorable and have dreams of one day becoming a princess.
But little girls turn in to preteen and teenage girls and that brings a whole new storm. One day they are following you around, wanting to be just like you, and it seems the next day they are closed up in their room texting and the only time you see them is if food or you buying them stuff is involved.
Oh. And they start worrying what everyone else is wearing, friends opinions will seem to matter more than yours and if they don't have that cute new shirt that so-and-so from YouTube designed they simply.will.die....
And you know that they won't because you start to remember those years and that you never believed your mom's advice and you call your mom to apologize with each new growing phase you face. {Again, sorry mom.}
But in all reality, I'm learning to take each new battle {or eye roll} as a learning experience for all of us. The biggest lesson I'm trying to teach them right now is that things are things. They're true beauty will always come from deep within and that they need to be able to look at themselves in the mirror at the end of the day and know that they were the absolute best person they could have been. And if they weren't, well, tomorrow is a new day.
I found a picture of this passage on Pinterest when I first signed up a few years ago. I never knew how important this passage would be for myself and my girls.
And the fact that it would start a bathroom remodel that should have happened a long time ago. I'm shocked I have ever been allowed to pick colors for our home after this pink. It's now painted in an eye pleasing sparrow gray and I will be keeping you up to date as it all comes together!
I whitewashed the sign to allow the wood to come through. Once I was done with the lettering, I distressed the front of the sign and painted some lattice boards the same black as the lettering and attached them to add a little dimension. I'm not sure exactly where in the bathroom it will hang yet, but I love that it will be there as a daily reminder to the girls before they head out in to the world for the day.
I do have this sign listed in my Etsy shop if you would like to take a peek and will be soon offering it in different sizes to fit every budget!
This post is also being shared here:
http://diyshowoff.com/category/other/that-diy-party/
Inspiration Monday at www.ishouldbemoppingthefloor.com
I Could Rule the World...
That was my statement to my husband the end of December..."If I could work as hard as I do during Christmas I'm pretty sure I could rule the world!"
Let me clarify, the handmade sign shop/blog/being the best crafter this world has ever seen world.
Ha! It's now the middle of February and I am no where near world domination {as you can tell since October is the last time I posted}. I'm not even close to dominating the craft market on my street.
Here's the thing, the highly successful shops you see on Etsy and the popular bloggers you love to read all have one thing in common. At some point they had to get their "stuff" together and figure out what works for them. Like a crafty a-ha moment, sometimes you have to change they way you work if you want to grow.
source
I recently sat down and thought about what bothered me most. The fact that I have a 3-4 week turnaround time on Etsy orders really started to eat at me. I know I have missed out on sales because some people don't want to have to wait that long for a purchase. I know that I have given myself permission way too many times to spend a couple days doing nothing because I was getting orders shipped way before my turnaround time.
Knowing that I have pages of pending orders waiting on me would be like a gloomy cloud over my head some days. A gloomy cloud that would start sucking the creativity out of me and I want my creativity back.
I'm know working like every day is like the last day of my Christmas rush. Well, Monday-Friday, 8-5 {and sometimes in the evening}. Not just painting. I'm finding my passion in photography again. I'm working on drafts for upcoming blog posts. I'm slowly getting my creativity back for new items in my Etsy shop.
source
And slowly working on dominating the craft world...on my street.
Let me clarify, the handmade sign shop/blog/being the best crafter this world has ever seen world.
Ha! It's now the middle of February and I am no where near world domination {as you can tell since October is the last time I posted}. I'm not even close to dominating the craft market on my street.
Here's the thing, the highly successful shops you see on Etsy and the popular bloggers you love to read all have one thing in common. At some point they had to get their "stuff" together and figure out what works for them. Like a crafty a-ha moment, sometimes you have to change they way you work if you want to grow.
source
I recently sat down and thought about what bothered me most. The fact that I have a 3-4 week turnaround time on Etsy orders really started to eat at me. I know I have missed out on sales because some people don't want to have to wait that long for a purchase. I know that I have given myself permission way too many times to spend a couple days doing nothing because I was getting orders shipped way before my turnaround time.
Knowing that I have pages of pending orders waiting on me would be like a gloomy cloud over my head some days. A gloomy cloud that would start sucking the creativity out of me and I want my creativity back.
I'm know working like every day is like the last day of my Christmas rush. Well, Monday-Friday, 8-5 {and sometimes in the evening}. Not just painting. I'm finding my passion in photography again. I'm working on drafts for upcoming blog posts. I'm slowly getting my creativity back for new items in my Etsy shop.
source
And slowly working on dominating the craft world...on my street.
Glad & Sincere Hearts
I often have people ask if my home is filled with beautiful signs. Simple answer, no. Detailed answer, I have a few that are my favorites and I have plans for so many I would like to make for our home. But honestly, sometimes at the end of the day it's hard to sit down and make something for your home when you just spent the day making signs for other people's homes.
One of my favorite things to do while paint is drying is towaste hours browse Pinterest for some inspiration. A while back I found this pin from Hymns and Verses.
I wish I could find the actual blog post in her blog about it, the link takes me back to her blog in general, not the post. I do know it is a tea towel sold from Mary & Martha that she framed to display in her home.
Besides the beautiful hand lettering, I also love the message.
In our home, we always eat dinner together. It's nice at the end of the day to sit together and talk about our day. We may not eat the same thing, but we are sitting at the table together. And even if the kids don't like what's for dinner {which rarely happens} we always remind them to be thankful for the food we do have instead of wishing it was something else. Some days it's easy to forget just how blessed you are.
One of my bad habits is finding a quote that I love and then stressing on making a design for my Etsy shop. Once I finally have a design I like, I'm over having it in my house. When I was working on this design, my husband saw it and asked for it to be in our home, only on a bigger scale than what I had in mind.
We had a top from a console table sitting around that I thought would look great as a sign and fit my husband's request for a big sign {it measures 10" x 48"}. We have high ceilings in our living and dining rooms so this sign looks great hanging on our dining room wall above the doorway that leads to the kitchen.
We have history with this table. It was one of the first pieces of furniture we bought after getting married. At that time we had a very country theme going on and it was stained the color shown and hunter green. Soon the green was gone, replaced with black. And it had been repaired...several times.
A little someone also practiced her writing skills on this table top...
Since I don't have an endless supply of table tops sitting around I also made a smaller version on a 1x8.
Even though it's a smaller version, the message is still as powerful. This size is listed here in my Etsy shop.
So, what statement is speaking to you right now?
Sharing and Linking up here!!
http://www.chaosandlove.com/link-party-21/
One of my favorite things to do while paint is drying is to
I wish I could find the actual blog post in her blog about it, the link takes me back to her blog in general, not the post. I do know it is a tea towel sold from Mary & Martha that she framed to display in her home.
Besides the beautiful hand lettering, I also love the message.
In our home, we always eat dinner together. It's nice at the end of the day to sit together and talk about our day. We may not eat the same thing, but we are sitting at the table together. And even if the kids don't like what's for dinner {which rarely happens} we always remind them to be thankful for the food we do have instead of wishing it was something else. Some days it's easy to forget just how blessed you are.
One of my bad habits is finding a quote that I love and then stressing on making a design for my Etsy shop. Once I finally have a design I like, I'm over having it in my house. When I was working on this design, my husband saw it and asked for it to be in our home, only on a bigger scale than what I had in mind.
We had a top from a console table sitting around that I thought would look great as a sign and fit my husband's request for a big sign {it measures 10" x 48"}. We have high ceilings in our living and dining rooms so this sign looks great hanging on our dining room wall above the doorway that leads to the kitchen.
We have history with this table. It was one of the first pieces of furniture we bought after getting married. At that time we had a very country theme going on and it was stained the color shown and hunter green. Soon the green was gone, replaced with black. And it had been repaired...several times.
A little someone also practiced her writing skills on this table top...
Since I don't have an endless supply of table tops sitting around I also made a smaller version on a 1x8.
Even though it's a smaller version, the message is still as powerful. This size is listed here in my Etsy shop.
So, what statement is speaking to you right now?
Sharing and Linking up here!!
http://www.chaosandlove.com/link-party-21/
Make a Clipboard!
In my last post I shared a clipboard I made and promised a tutorial was coming. Well, I'm not sure how much of a tutorial it is since I forgot to take pictures along the way, but here it is!
I am loving the trend of using clipboards to display just about anything that will lay flat but most of the time I want to display something that would be lost on a normal size clipboard. Plus, a run of the mill clipboard can't stand on it's own.
I had ordered some prints from Katy Girl Designs {click here to visit her Etsy shop} and had planned on displaying this one on my chicken wire frame above my work table. Once it came I realized it was too cute to be clothes pinned up to chicken wire.
I used a piece of 2x8 wood I had cut 10 inches long and stained it. The beauty of this is that you can cut one to any size, plus you can use a thinner board if you want to hang it on the wall. And you can paint it to match your décor. I chose to stain this one since I am a huge lover of the beauty of wood grain, especially when it's a little knotty. ;)
I did give it a good sanding the next day once the stain had dried, just to give it a rustic, well loved look. For protection and to give the wood a little sheen I added a coat of furniture wax. It helps deepen the color and keep the wood from looking like it's dried out.
This whole project started because I had found these clipboard clips at Hobby Lobby.
They come in a two pack and have a wonderful vintage feel. Although, I seriously think that Tim Holtz only knows vintage. The only downfall with these clips is that they do not come with screws for mounting. I dug through our boxes of mismatched screws and found the ones that would work best.
Old and a little rusty. I would be lying if I even tried to tell you what they came off of.
Now comes the fun part, displaying whatever your heart desires and having a fun photo shoot!
I am loving the trend of using clipboards to display just about anything that will lay flat but most of the time I want to display something that would be lost on a normal size clipboard. Plus, a run of the mill clipboard can't stand on it's own.
I had ordered some prints from Katy Girl Designs {click here to visit her Etsy shop} and had planned on displaying this one on my chicken wire frame above my work table. Once it came I realized it was too cute to be clothes pinned up to chicken wire.
I used a piece of 2x8 wood I had cut 10 inches long and stained it. The beauty of this is that you can cut one to any size, plus you can use a thinner board if you want to hang it on the wall. And you can paint it to match your décor. I chose to stain this one since I am a huge lover of the beauty of wood grain, especially when it's a little knotty. ;)
I did give it a good sanding the next day once the stain had dried, just to give it a rustic, well loved look. For protection and to give the wood a little sheen I added a coat of furniture wax. It helps deepen the color and keep the wood from looking like it's dried out.
This whole project started because I had found these clipboard clips at Hobby Lobby.
They come in a two pack and have a wonderful vintage feel. Although, I seriously think that Tim Holtz only knows vintage. The only downfall with these clips is that they do not come with screws for mounting. I dug through our boxes of mismatched screws and found the ones that would work best.
Old and a little rusty. I would be lying if I even tried to tell you what they came off of.
Now comes the fun part, displaying whatever your heart desires and having a fun photo shoot!
And as always, nothing gets photographed in the backyard without these two butting in while trying to look like they're not!
How to Fix Leaning Shelves
Name one thing that frustrates you. Is shelves that lean at the top of your list? Then you're at the right place my friend! Today I'm showing you how I fixed my leaning shelves.
One of my goals this year {actually every year!} is to get some more organization in my life, especially my workspace. I was so excited when I got some floating shelves up so that I could get some items off of my work table...only to realize that the shelves had one major downfall, the hardware provided to hang them was causing them to slowly pull away from the wall. Great for a blog post but frustrating when your stuff keeps falling off!
I was so happy for the extra workspace I was going to gain on my worktable once I got the shelves up. I even made a cute clipboard to hold a print I had ordered {tutorial coming soon for the clipboard!} for my work room.
You can see the slight lean of the shelves. You wouldn't think such a slight angle would affect a shelf but it does!
The one problem I faced with these shelves is that they are not very wide so a simple shelf bracket would not work. I was also trying to avoid using a plain L bracket to keep them level. While browsing through Lowe's one day {some women browse the mall, I'm a big fan of home improvement stores} I came across these.
These are chair braces, technically made for repairing chairs but would work great for this project.
I attached them to the bottom of each shelf and put the shelves back on the wall. I held the shelf level and then screwed the brace to the wall.
No more leaning shelves!! And it is much more attractive than a basic L bracket screwed to the wall.
Stay tune for the tutorial for the clipboard. The gorgeous printable came from Katy Girl Designs and she has them listed here in her Etsy shop.
One of my goals this year {actually every year!} is to get some more organization in my life, especially my workspace. I was so excited when I got some floating shelves up so that I could get some items off of my work table...only to realize that the shelves had one major downfall, the hardware provided to hang them was causing them to slowly pull away from the wall. Great for a blog post but frustrating when your stuff keeps falling off!
I was so happy for the extra workspace I was going to gain on my worktable once I got the shelves up. I even made a cute clipboard to hold a print I had ordered {tutorial coming soon for the clipboard!} for my work room.
Then I walked in the next day to realize that the clipboard AND giant glass jar of glass glitter were lying on the floor! The culprit? The hardware provided with the shelves was not enough to keep the shelves tight against the wall once you put something on it.
You can see the slight lean of the shelves. You wouldn't think such a slight angle would affect a shelf but it does!
The one problem I faced with these shelves is that they are not very wide so a simple shelf bracket would not work. I was also trying to avoid using a plain L bracket to keep them level. While browsing through Lowe's one day {some women browse the mall, I'm a big fan of home improvement stores} I came across these.
These are chair braces, technically made for repairing chairs but would work great for this project.
I attached them to the bottom of each shelf and put the shelves back on the wall. I held the shelf level and then screwed the brace to the wall.
No more leaning shelves!! And it is much more attractive than a basic L bracket screwed to the wall.
Stay tune for the tutorial for the clipboard. The gorgeous printable came from Katy Girl Designs and she has them listed here in her Etsy shop.
A Vintage Inspired Halloween
Browsing around blog land I have come to realize that I may be the only one that has not decorated for Fall yet. Why not? For 2 simple reasons:
One year I didn't put anything up for Halloween and that was pretty scary. My now 8 year old has always loved to watch the transformation and she threw a full on fit that year that it was Halloween and we didn't have one single Halloween decoration out. Now she's sure to remind me that it is coming up and will even ask her father to get the Halloween bucket out of the attic as a visual reminder that I need to put the decorations up.
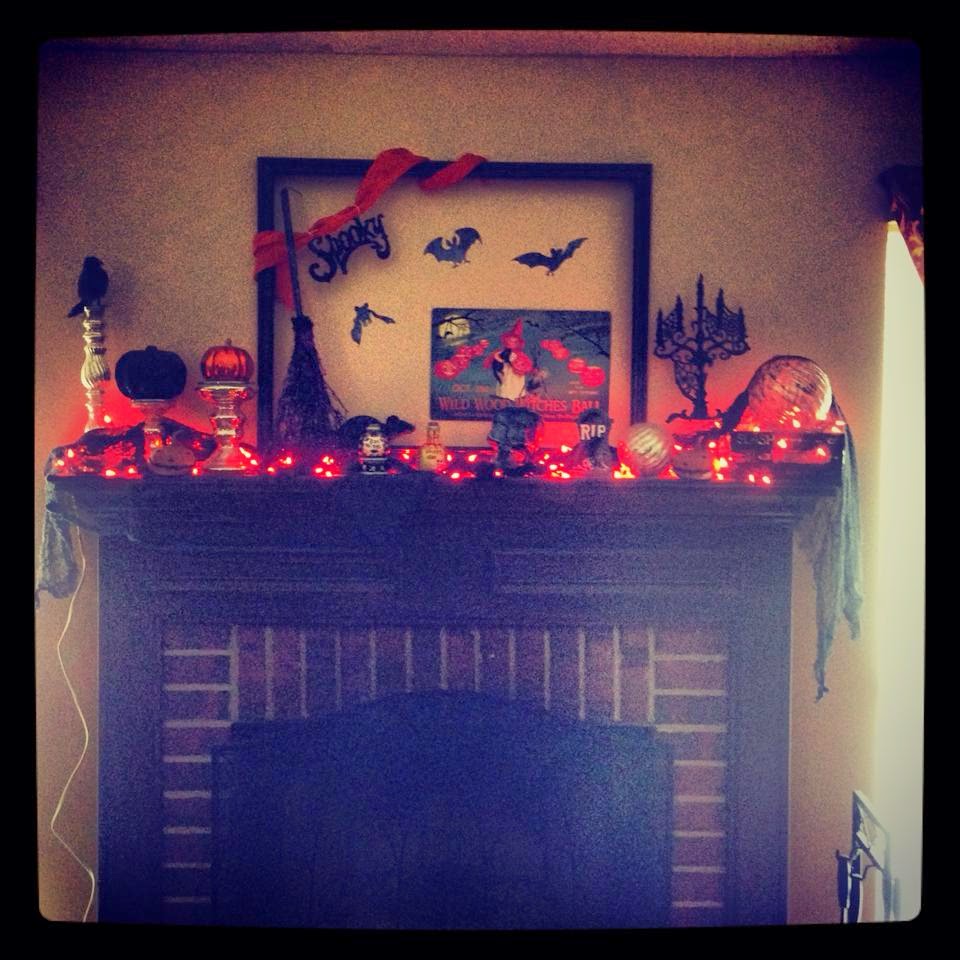
This is our mantel from last year, it's been the typical Halloween mantel for us...
1. I find it hard to get in the Fall spirit when it is still the temperature is still hovering between 90 and 100.
2. My family really loves for me to decorate for Halloween.
One year I didn't put anything up for Halloween and that was pretty scary. My now 8 year old has always loved to watch the transformation and she threw a full on fit that year that it was Halloween and we didn't have one single Halloween decoration out. Now she's sure to remind me that it is coming up and will even ask her father to get the Halloween bucket out of the attic as a visual reminder that I need to put the decorations up.
This is our mantel from last year, it's been the typical Halloween mantel for us...
Some dollar store items mixed in with some pumpkins and lights. Sometimes it's more, sometimes it's less... and sometimes is nothing :) .
This year I'm wanting to change it up a bit. If you know me, you know that I am a vintage lover to my core. I'll take dusty and rusty over brand new and sparkly any day. I was absolutely tickled to see that Hobby Lobby had some vintage reproductions in their Halloween section. I need to set a week aside to go in daily to use my 40% off coupon. Scratch that, I just realized they have marked Halloween 40% off!
I decided to browse Pinterest to get some ideas...
I pinned all of these that were linked back to various blogs and websites but soon found out that they all came from the very talented Johanna Parker Design. I love how authentic they look, I'm sure they look even more like actual vintage pieces in person.
I also found some really fun collections that are displayed beautifully. This wall collection would be so fun above the mantel or as a display wall for your trick or treaters to drool over when you open the door.
And I love this collection of crepe paper characters. I'm learning that crepe paper was essential when it came to decorating.
And I love how this one mixes some Halloween in with their dishes and everyday things. {And the link leads to a slideshow with some other great ideas!}
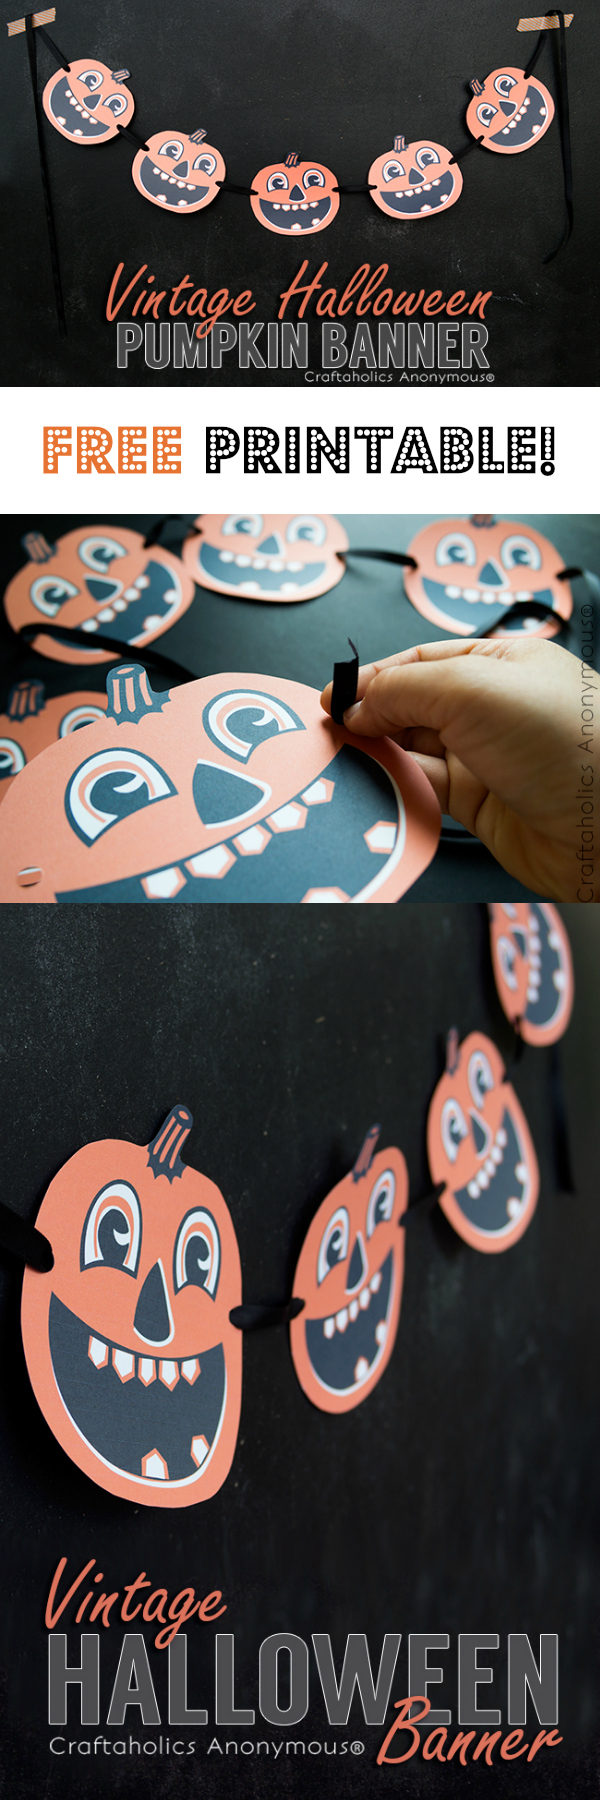
Have I got your vintage loving creative juices flowing? Well, then here are a couple vintage themed printables that I found and will be definitely using somehow with my decorations.
I'm looking forward to using some of these ideas I've shared with you to bring a little Halloween in to our home. I have already asked my husband to save all the tree branches he plans on trimming off our tree this weekend for my Halloween decorating. Stay tuned and I will be posting pictures soon!
All That Glitters...
Sooooo, I felt like I was getting on a roll with getting new blog posts up, but since (and during) the last time I put a new blog post up I was in the middle of getting my girls ready for school, my girls started school (=new schedule to get used to), I fell a little behind on orders and needed to catch up, I decided I wanted to devote more time to my retail space that I have not given it and I got sick...BUT, the good news is I'm slowly working out a schedule that will let me post more often.
Anywho, let's get down to what you came for...glitter!!
I recently ordered some new German glass glitter from Meyer Imports and while paint was drying on orders, I have been having some fun with it. I have used it before on chipboard letters and turned them in to magnets. While digging through my craft hoard stash I found an obscene amount of wood clothes pins and the glue and glitter started flying.
Working with the glass glitter is a really easy, fun and cheap way to add a little sparkle to ordinary things. Meyer Imports also sells a glue that works great, but I've also had really good luck with the Elmer's Glue All glue. Make sure it's not the school glue though, it's not strong enough to hold the heavy glitter on your item.
I'm a big fan of the glitter in a simple jar for decoration also. My girls and I made a quick trip to Hobby Lobby one day and I found some really cute small jars and tags that I thought would work for small wish jars. When the 11 year old excitedly agrees and asks for one for her room, you snap the supplies up.
I just used some small stamps I had on hand with some Tim Holtz metal tags and tied it on with some red and white baker's twine. How fun would these be as Christmas ornaments? I'm also debating about putting them in my Etsy shop, some sparkle to balance out all the wood.
In my downtime watching paint dry I also start looking at things I have lying around to reuse for something fun. I had a thick cardboard tube that had potential. I took it out to my saw, cut off a chunk of it and craftiness ensued.
I cut random pieces out to make it in to a quirky little crown.
That this quirky girl decided to try on...